引言
Vagrant 是一个基于 Ruby 的工具,用于创建和部署虚拟化开发环境,基于VirtualBox。
这种环境搭建的方式有个问题,就是每次关机前都要先 vagrant halt 关闭服务,不然下次启动就会异常从而导致无法正常使用。
具体参考:
Windows 下PHP开发环境LNMP搭建流程:https://ibaiyang.github.io/blog/linux/2017/07/01/Windows-下PHP开发环境LNMP搭建流程.html
VirtualBox 搭建Centos7.8:https://ibaiyang.github.io/blog/linux/2022/02/15/VirtualBox-搭建Centos7.8.html
Vagrant 使用命令:https://ibaiyang.github.io/blog/linux/2021/08/21/Vagrant-使用.html
vagrant异常处理:https://ibaiyang.github.io/blog/linux/2017/12/28/vagrant异常处理.html
vagrant 运行速度越来越慢解决方法:https://ibaiyang.github.io/blog/linux/2018/06/06/vagrant-运行速度越来越慢解决方法.html
vagrant js/css文件缓存及乱码解决:https://ibaiyang.github.io/blog/linux/2018/01/30/vagrant-js,css文件缓存及乱码解决.html
两次安装失败的记录,也可以参考下:
https://ibaiyang.github.io/blog/linux/2021/08/22/Vagrant-Centos7.8搭建.html
https://ibaiyang.github.io/blog/linux/2021/08/22/Vagrant-Centos8.3搭建.html
部署命令
Vagrant 结合 VirtualBox 搭建虚拟机。
将box放在准备搭建的目录下,运行:
用box add命令添加运行环境:
vagrant box add centos67 box/centos67.box
用init初始化:
vagrant init
修改文件Vagrantfile。
接着用up启动:
vagrant up
现在,我们的Linux已经安装好了,并且已经成功启动。
打包为 box:
vagrant package
如果想删除这个虚拟环境,先停止运行:
vagrant halt
查看状态:
vagrant global-status
删除对应环境:
vagrant destroy bb5b8d6
查看box:
vagrant box list
移除box:
vagrant box remove centos67_2
详细过程:
G:\vagrant2>vagrant global-status
id       name    provider   state    directory
-------------------------------------------------------------------------
396bc5c  default virtualbox poweroff G:/vagrant
bb5b8d6  default virtualbox poweroff G:/vagrant2

The above shows information about all known Vagrant environments
on this machine. This data is cached and may not be completely
up-to-date. To interact with any of the machines, you can go to
that directory and run Vagrant, or you can use the ID directly
with Vagrant commands from any directory. For example:
"vagrant destroy 1a2b3c4d"

G:\vagrant2>
G:\vagrant2>vagrant destroy bb5b8d6
    default: Are you sure you want to destroy the 'default' VM? [y/N] y
==> default: Destroying VM and associated drives...

G:\vagrant2>
G:\vagrant2>vagrant global-status
id       name    provider   state    directory
-------------------------------------------------------------------------
396bc5c  default virtualbox poweroff G:/vagrant

The above shows information about all known Vagrant environments
on this machine. This data is cached and may not be completely
up-to-date. To interact with any of the machines, you can go to
that directory and run Vagrant, or you can use the ID directly
with Vagrant commands from any directory. For example:
"vagrant destroy 1a2b3c4d"

G:\vagrant2>vagrant status
Current machine states:

default                   not created (virtualbox)

The environment has not yet been created. Run `vagrant up` to
create the environment. If a machine is not created, only the
default provider will be shown. So if a provider is not listed,
then the machine is not created for that environment.

G:\vagrant2>
G:\vagrant2>cd ..

G:\>vagrant box list
centos67   (virtualbox, 0)
centos67_2 (virtualbox, 0)

G:\>
G:\>vagrant box remove centos67_2
Removing box 'centos67_2' (v0) with provider 'virtualbox'...

G:\>
G:\>vagrant box list
centos67 (virtualbox, 0)

G:\>
可用命令
vagrant输入错误命令后,会提示可用命令:
Usage: vagrant [options] <command> [<args>]

    -h, --help                       Print this help.

Common commands:
     autocomplete    manages autocomplete installation on host
     box             manages boxes: installation, removal, etc.
     cloud           manages everything related to Vagrant Cloud
     destroy         stops and deletes all traces of the vagrant machine
     global-status   outputs status Vagrant environments for this user
     halt            stops the vagrant machine
     help            shows the help for a subcommand
     init            initializes a new Vagrant environment by creating a Vagrantfile
     login
     package         packages a running vagrant environment into a box
     plugin          manages plugins: install, uninstall, update, etc.
     port            displays information about guest port mappings
     powershell      connects to machine via powershell remoting
     provision       provisions the vagrant machine
     push            deploys code in this environment to a configured destination
     rdp             connects to machine via RDP
     reload          restarts vagrant machine, loads new Vagrantfile configuration
     resume          resume a suspended vagrant machine
     snapshot        manages snapshots: saving, restoring, etc.
     ssh             connects to machine via SSH
     ssh-config      outputs OpenSSH valid configuration to connect to the machine
     status          outputs status of the vagrant machine
     suspend         suspends the machine
     up              starts and provisions the vagrant environment
     upload          upload to machine via communicator
     validate        validates the Vagrantfile
     version         prints current and latest Vagrant version
     winrm           executes commands on a machine via WinRM
     winrm-config    outputs WinRM configuration to connect to the machine

For help on any individual command run `vagrant COMMAND -h`

Additional subcommands are available, but are either more advanced
or not commonly used. To see all subcommands, run the command
`vagrant list-commands`.
        --[no-]color                 Enable or disable color output
        --machine-readable           Enable machine readable output
    -v, --version                    Display Vagrant version
        --debug                      Enable debug output
        --timestamp                  Enable timestamps on log output
        --debug-timestamp            Enable debug output with timestamps
        --no-tty                     Enable non-interactive output
js/css文件缓存及乱码解决
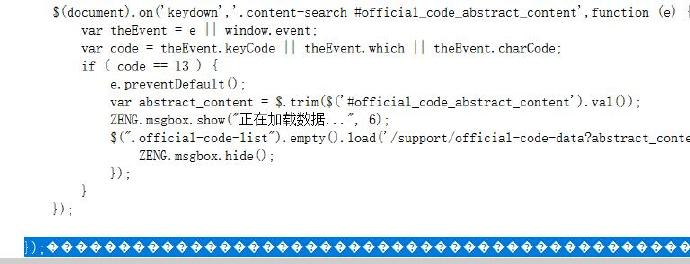
用vagrant搭建虚拟机进行开发,有时在nginx环境下,发现js/css等没有及时刷新,有时又报乱码:
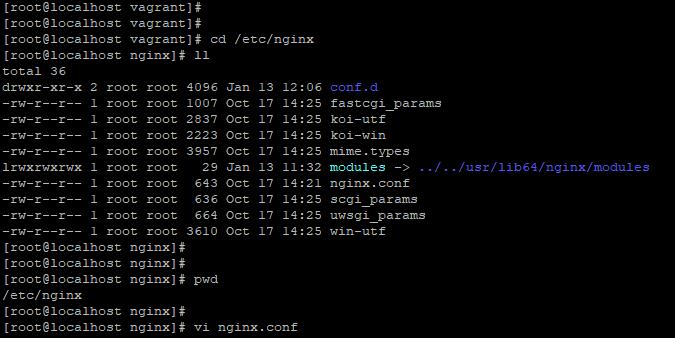
我们需要修改nginx的配置:
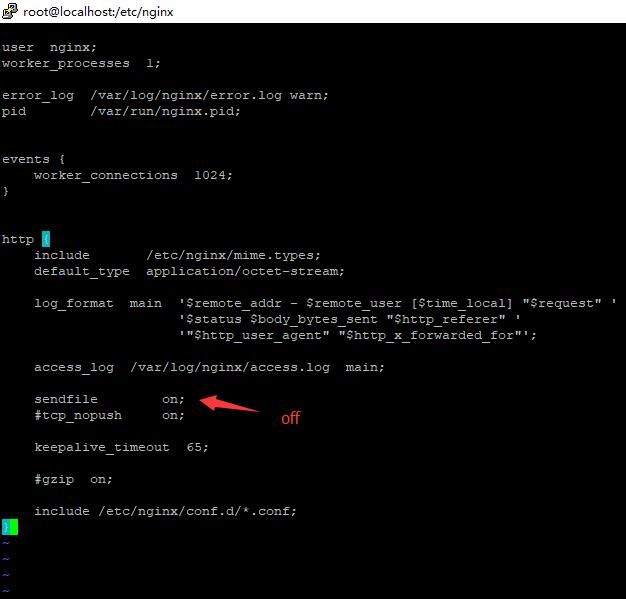
然后ok。
sendfile
配置示例
http {
    # other directives
    sendfile    on;
    # other directives
}
指令说明
语法: sendfile on | off;
默认值: sendfile off;
上下文: http,server,location,if in location
指定是否使用sendfile系统调用来传输文件。
sendfile系统调用在两个文件描述符之间直接传递数据(完全在内核中操作), 从而避免了数据在内核缓冲区和用户缓冲区之间的拷贝,操作效率很高,被称之为零拷贝。
read/write
在传统的文件传输方式(read、write/send方式),具体流程细节如下:
- 调用read函数,文件数据拷贝到内核缓冲区
- read函数返回,数据从内核缓冲区拷贝到用户缓冲区
- 调用write/send函数,将数据从用户缓冲区拷贝到内核socket缓冲区
- 数据从内核socket缓冲区拷贝到协议引擎中
在这个过程当中,文件数据实际上是经过了四次拷贝操作:
硬盘—>内核缓冲区—>用户缓冲区—>内核socket缓冲区—>协议引擎
sendfile
sendfile系统调用则提供了一种减少拷贝次数,提升文件传输性能的方法。
- sendfile系统调用利用DMA引擎将文件数据拷贝到内核缓冲区,之后数据被拷贝到内核socket缓冲区中
- DMA引擎将数据从内核socket缓冲区拷贝到协议引擎中
这里没有用户态和内核态之间的切换,也没有内核缓冲区和用户缓冲区之间的拷贝,大大提升了传输性能。
这个过程数据经历的拷贝操作如下:
硬盘—>内核缓冲区—>内核socket缓冲区—>协议引擎
带有DMA收集拷贝功能的sendfile
对于带有DMA收集拷贝功能的sendfile系统调用,还可以再减少一次内核缓冲区之间的拷贝。具体流程如下:
- sendfile系统调用利用DMA引擎将文件数据拷贝到内核缓冲区,之后,将带有文件位置和长度信息的缓冲区描述符添加到内核socket缓冲区中
- DMA引擎会将数据直接从内核缓冲区拷贝到协议引擎中
这个过程数据经历的拷贝操作如下:
硬盘—>内核缓冲区—>协议引擎
参阅:
https://blog.smdcn.net/article/1325.html
http://blog.csdn.net/backnet/article/details/38581813
nginx中配置sendfile及详细说明 https://www.jianshu.com/p/70e1c396c320?utm_campaign
未halt重启异常
一般我们vagrant up后,关机时都会vagrant halt,(vagrant destroy会丢失linux上安装的软件,如php、nginx、mysql等等,所以不要用destroy),但有一次win10电脑升级时自动重启了电脑,然后vagrant就不能启动了。
查看状态,是poweroff;强制halt,没有变,理论上也不会变;强制重启,有问题。
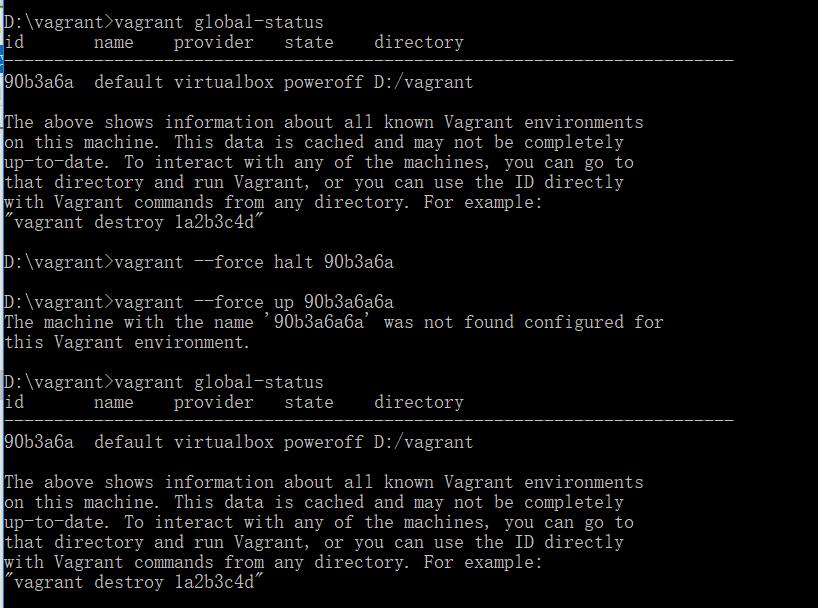
直接up启动,下面报错。
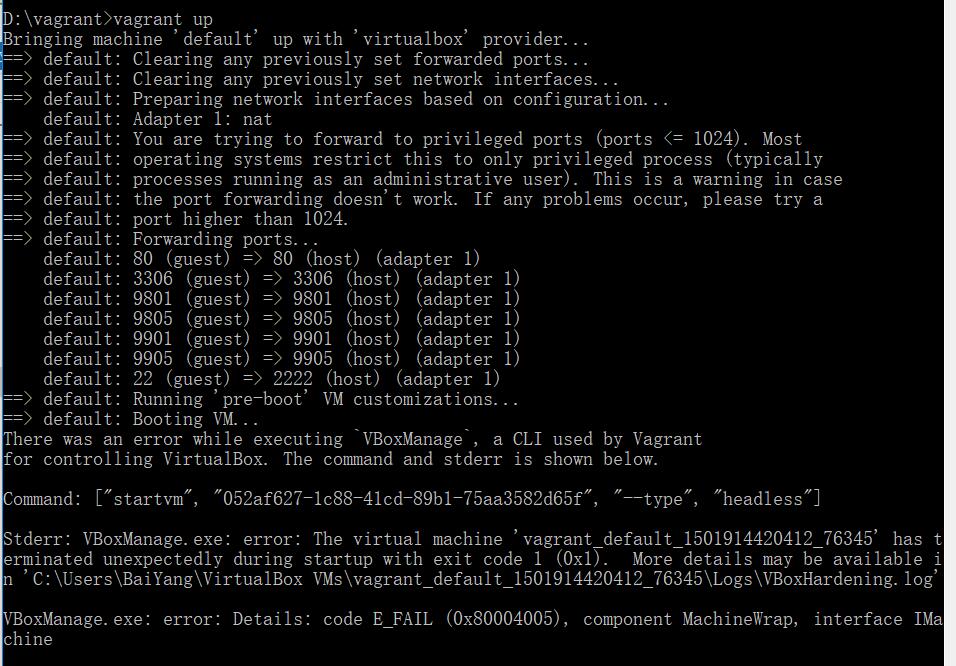
强制reload也不行。

看来要重新安装了,package把LNMP环境打包一下,已备使用。把配置文件也备份了。

destroy后再重启,也无济于事。
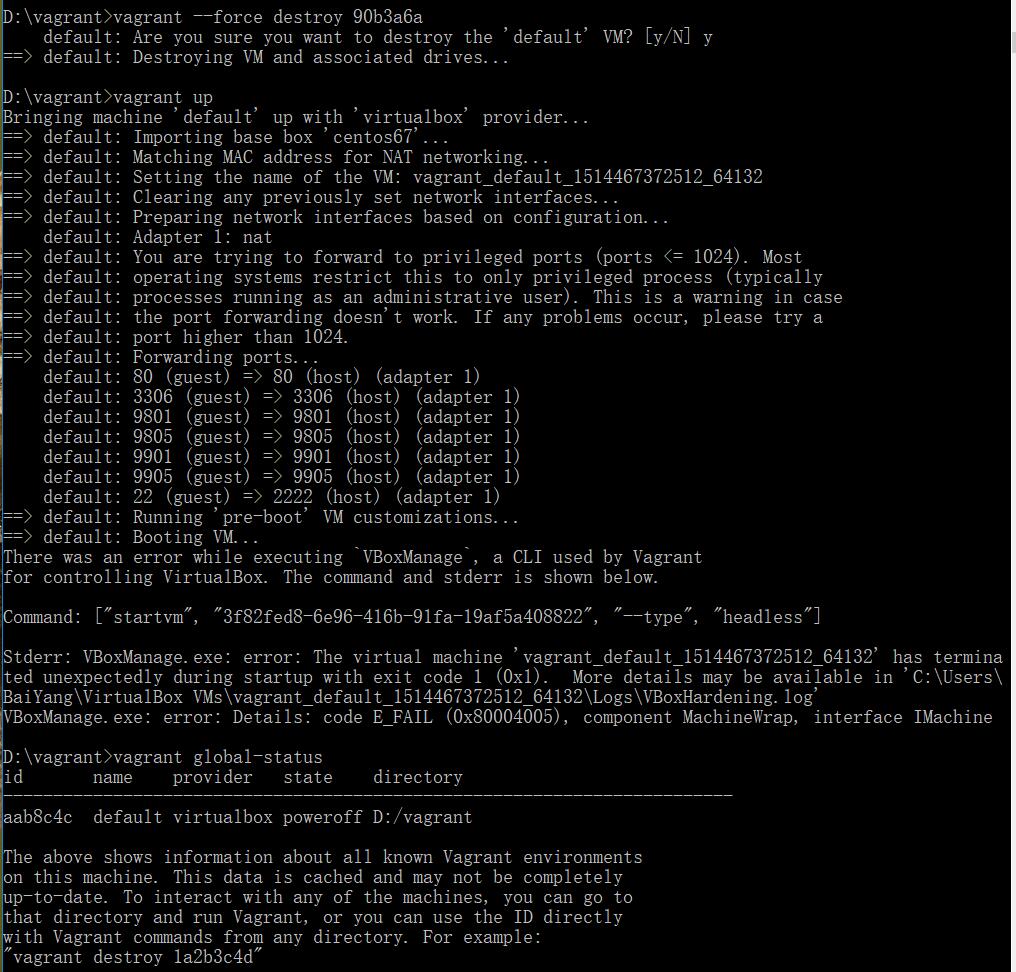
其实destroy可以从内存中清除所有预载环境。

把我们的虚拟环境remove了吧。

重新add试试,init看看。
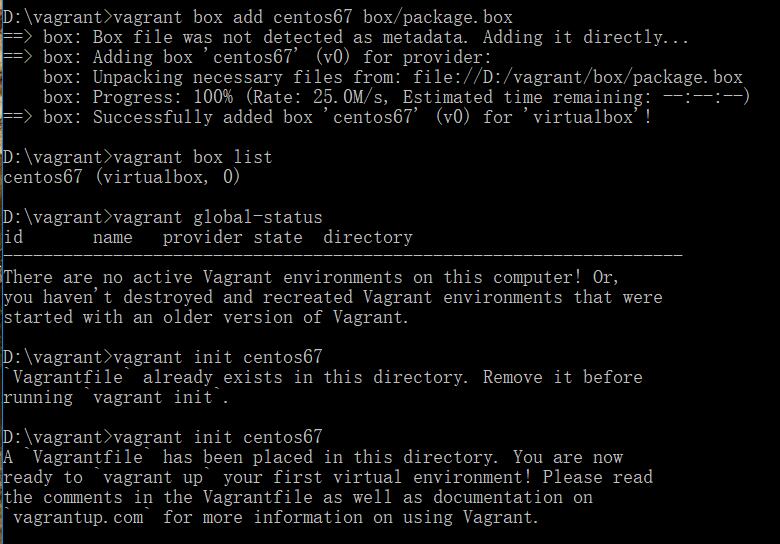
init前把目录下的这两个删除了,然后init,生成配置文件,当然里面的配置是新的,我们把之前备份的配置文件复制替换它。

接着up看看,还是同样的问题。
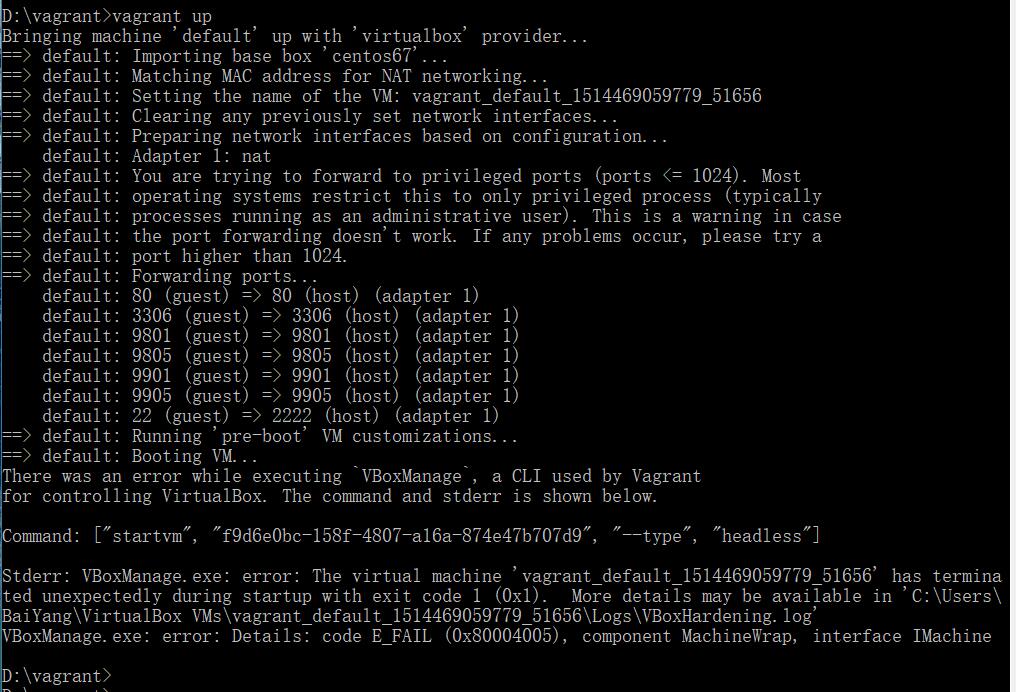
destroy后remove了吧。
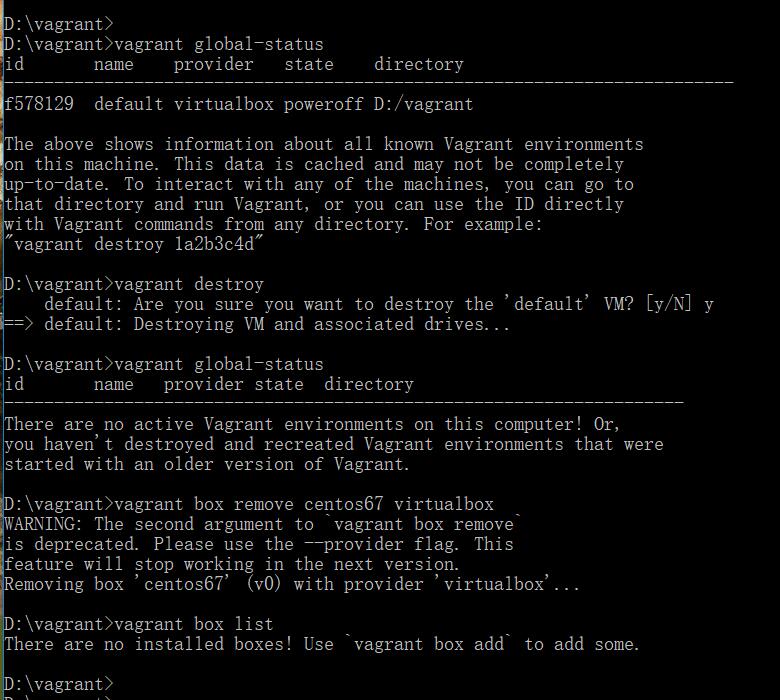
只能重装virtualBox了,是virtualBox5.0.36的原因,有东西遗留在电脑硬件中了,重装win10系统都不能解决问题、顺利up。
下面是解决问题的方法——重装,当然你也可以用package包:
重装virtualBox,版本降级为:4.3.12

cmd到vagrant目录下 box add:

当init时报错,把跟目录下的原来的配置文件删了,包括.vagrant文件夹和Vagrantfile:
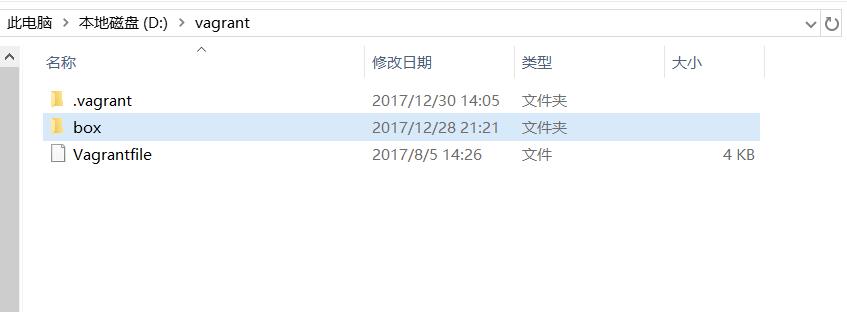
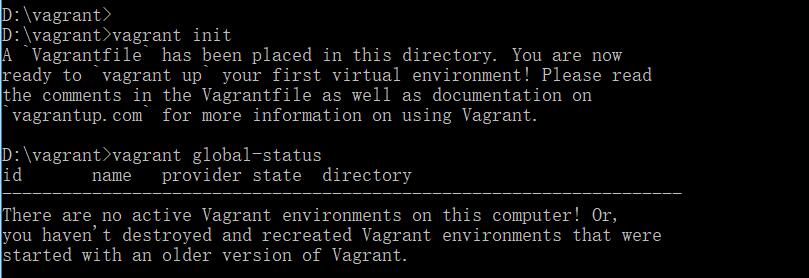
然后重新init:
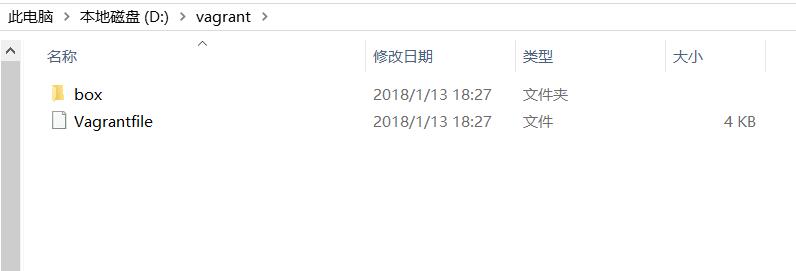
看一下根目录:
修改配置文件为:
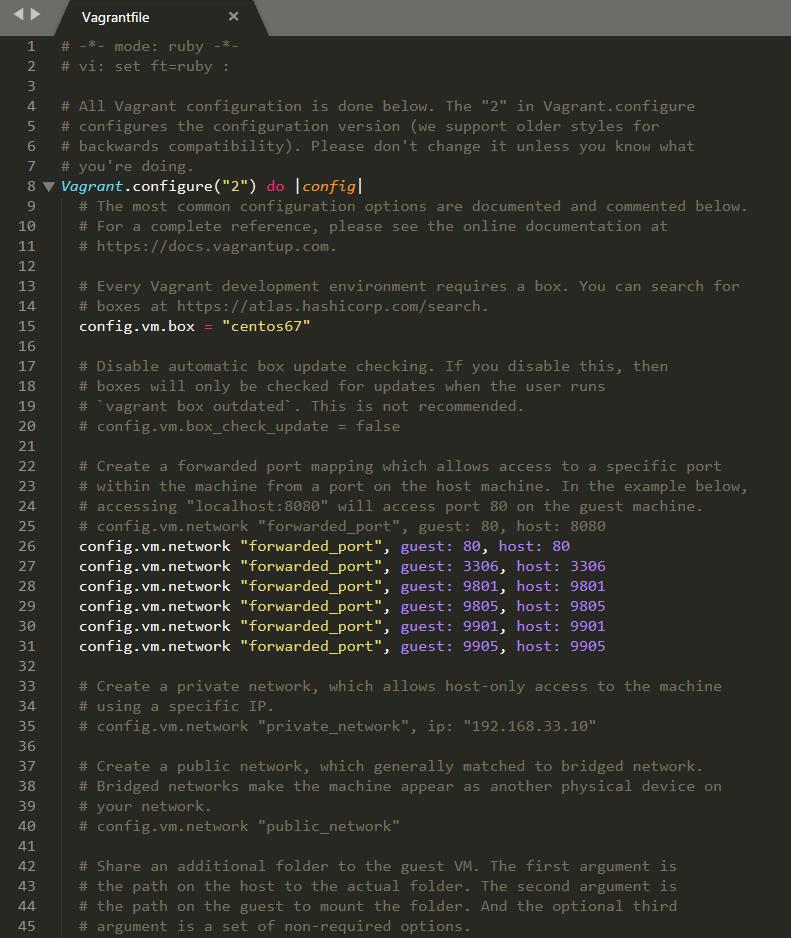

然后up,可以看到进度:
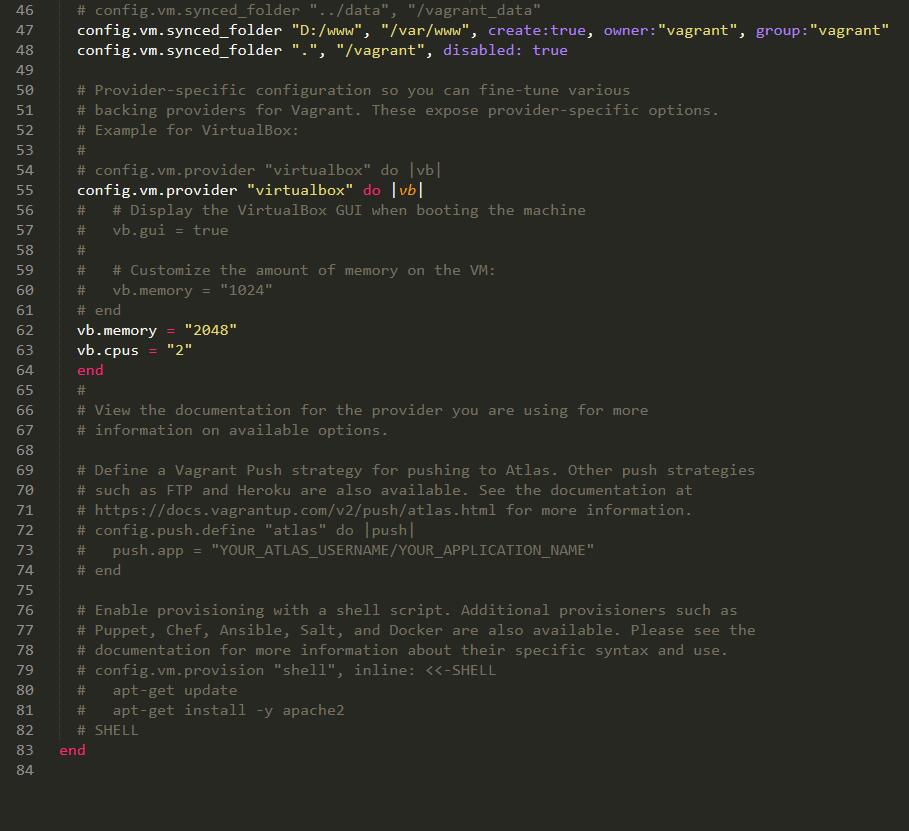
结果发现有报错,80端口被占用:
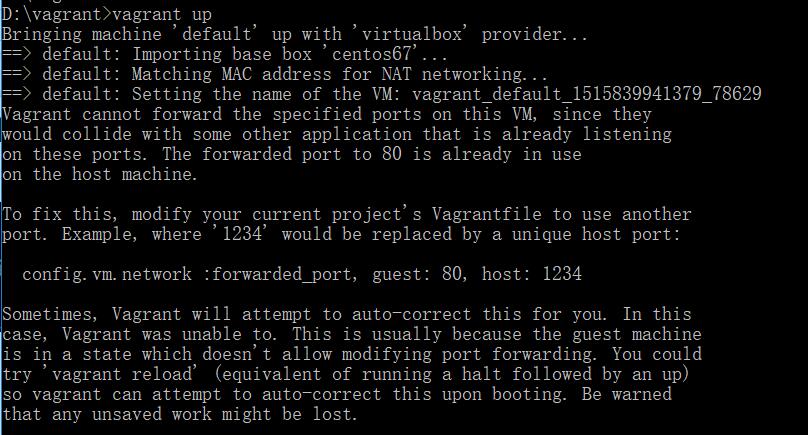
把wamp等其他环境全部关闭并退出。重新up,结束后:
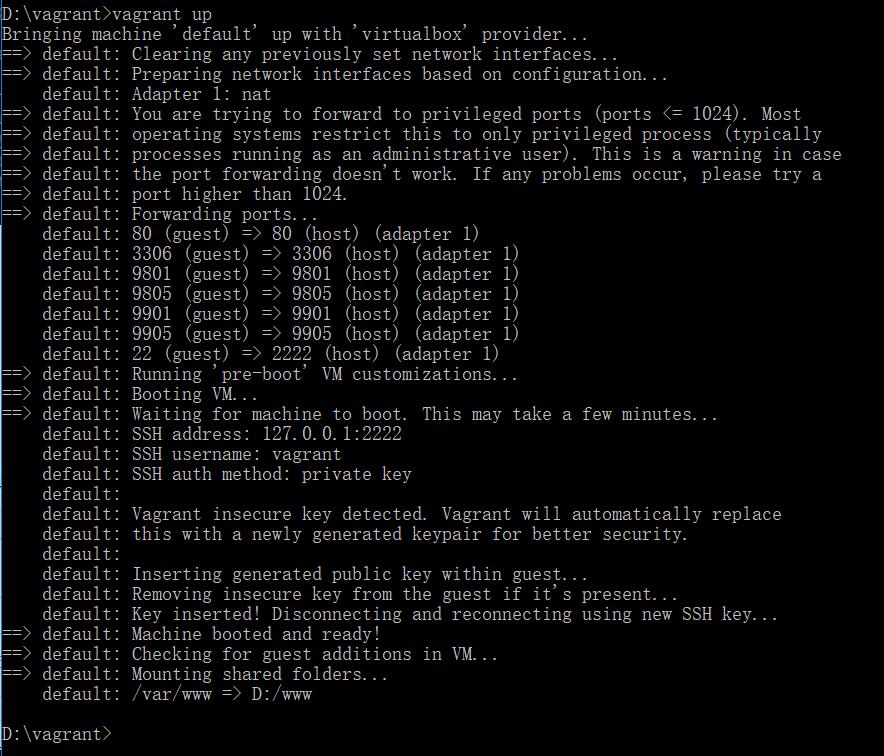
看一下状态:
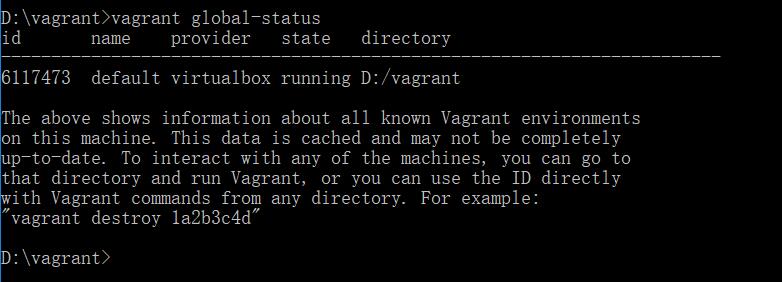
看一下根目录:
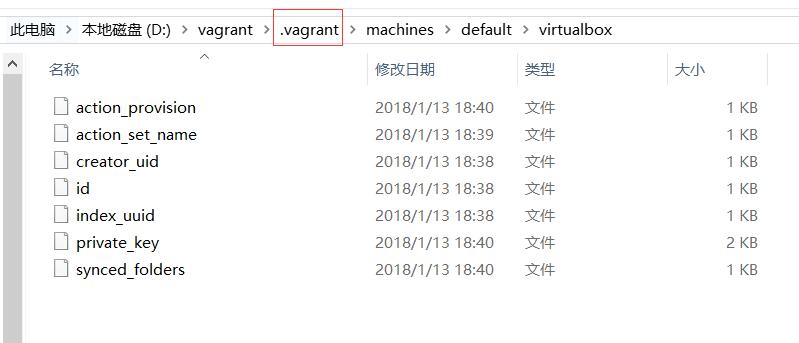
顺利启动。如果up不能成功,就用vagrant reload。
参阅:
http://www.pangyiguang.com/blog/93.html
http://blog.sina.com.cn/s/blog_6aba78b40102x297.html
vagrant异常处理 http://blog.sina.com.cn/s/blog_6aba78b40102xa1g.html
参考资料
超详细的 Vagrant 上手指南 https://zhuanlan.zhihu.com/p/259833884
Discover Vagrant Boxes https://app.vagrantup.com/boxes/search
Centos包 https://cloud.centos.org/centos/
CentOS Download https://www.centos.org/download/
centos/8 Vagrant box https://app.vagrantup.com/centos/boxes/8
libvirt (简体中文) https://wiki.archlinux.org/title/Libvirt_(%E7%AE%80%E4%BD%93%E4%B8%AD%E6%96%87)